

This feature is only available for Enterprise customers.
How do I manage users with Role Based Access Control?
Role-Based Access Control (RBAC) allows you to grant and enforce access to functionalities and integrated repositories by assigning pre-defined roles to users. To give you better control over what functionality and data can be accessed by different users, these roles are assigned per individual repository. A single user can have one level of access rights for one repository and a different level for another. Anything a user can see and do in an integrated repository is defined by their role.
By default, once a new repository is integrated, only the company admin(s) get access to it (apart from the user integrating it), while other users are assigned the No access role. As a company admin, you are able to set the default role to one of your choice (up to the Reviewer role), which will be assigned to users every time a new repository is integrated.
To do so:

- Go to Admin tools
- Input your password to enter the administrative mode
- In the User permissions tab, click on the dropdown and select a role of your choice
User roles
We currently define seven different user roles:
No access
Users with this role can only see the name of the repository, but can’t access any more information.
Viewer
Recommended for non-code contributors who want to view or discuss your project. See details below.
Users with this role can:
- view repository information
- view Start Left information
- add comments
- create reports
- access the API (limited by endpoints)
Developer
Recommended for contributors who should be able to create pull requests and fix vulnerabilities. See details below.
Users with this role can:
- access the repository
- view repository information
- integrate repositories
- add comments
- view Start Left information
- create reports
- access the API (limited by endpoints)
- create Pull Requests
- pause vulnerabilities
- perform manual uploads (only via the API)
Reviewer
Recommended for contributors who need to review and triage vulnerabilities and the like. See details below.
Users with this role can:
- access the repository
- view repository information
- integrate repositories
- add comments
- view Start Left information
- create reports
- access the API (limited by endpoints)
- create Pull Requests
- pause and snooze vulnerabilities
- set and change the review status
- perform manual uploads
Maintainer
Recommended for contributors who don’t need to review and triage, but are able to manage the repository, perform manual uploads, and invite users. See details below.
Users with this role can:
- access the repository
- view repository information
- integrate repositories
- add comments
- view Start Left information
- create reports
- access the API (limited by endpoints)
- create Pull Requests
- pause vulnerabilities
- modify repository automation rules
- edit other users’ permissions (up to own levels)
- invite users
- edit repository use cases
- set the default branch for the repository
- enable or disable GitHub scanning
- delete repositories
- delete commits
- perform manual uploads
Repository admin
Recommended for people who need full access to the repository, including reviews and triaging. See details below.
Users with this role can:
- access the repository
- view repository information
- integrate repositories
- add comments
- view Start Left information
- create reports
- access the API (limited by endpoints)
- create Pull Requests
- pause and snooze vulnerabilities
- create access tokens
- modify repository automation rules
- edit other users’ permissions (up to own levels)
- invite users
- edit repository use cases
- set the default branch for the repository
- enable or disable GitHub scanning
- delete the repository
- delete commits
- perform manual uploads
- set and edit the review status
Company admin
The highest level of access. Recommended for people who need full access to all repositories and settings. See details below.
Users with this role can perform all actions of a Repository admin, plus:
- modify all automation rules
- edit all use cases
- delete the company account
- access billing self-serve
- whitelist email domains
- enforce 2 factor authentication
- change SSO settings
- modify default automations
- toggle allowing/disallowing snooze
- delete other accounts
- disable other accounts
- update account information for other users
Available actions per user role
| Action | Viewer | Developer | Reviewer | Maintainer | Repository Admin | Company Admin |
|---|---|---|---|---|---|---|
| View repository information | ✓ | ✓ | ✓ | ✓ | ✓ | ✓ |
| View Start Left information | ✓ | ✓ | ✓ | ✓ | ✓ | ✓ |
| Access to API | ✓ | ✓ | ✓ | ✓ | ✓ | ✓ |
| Create reports | ✓ | ✓ | ✓ | ✓ | ✓ | ✓ |
| Add comments | ✓ | ✓ | ✓ | ✓ | ✓ | ✓ |
| Access the repository | ✓ | ✓ | ✓ | ✓ | ✓ | ✓ |
| Integrate repositories | ✓ | ✓ | ✓ | ✓ | ✓ | |
| Create Pull Requests | ✓ | ✓ | ✓ | ✓ | ✓ | |
| Pause vulnerabilities | ✓ | ✓ | ✓ | ✓ | ✓ | |
| Perform manual uploads | ✓ | ✓ | ✓ | ✓ | ✓ | |
| Snooze vulnerabilities | ✓ | ✓ | ✓ | |||
| Set and change the review status | ✓ | ✓ | ✓ | |||
| Modify automation rules for a given repository | ✓ | ✓ | ✓ | |||
| Edit other users’ permissions (up to own levels) | ✓ | ✓ | ✓ | |||
| Invite users | ✓ | ✓ | ✓ | |||
| Edit repository use cases | ✓ | ✓ | ✓ | |||
| Set the default branch for the repository | ✓ | ✓ | ✓ | |||
| Enable or disable GitHub scanning | ✓ | ✓ | ✓ | |||
| Delete repositories | ✓ | ✓ | ✓ | |||
| Delete commits | ✓ | ✓ | ✓ | |||
| Create access tokens | ✓ | ✓ | ||||
| Delete the company account | ✓ | |||||
| Access billing self-serve | ✓ | |||||
| Whitelist email domains | ✓ | |||||
| Enforce 2 factor authentication | ✓ | |||||
| Change SSO settings | ✓ | |||||
| Modify default automations | ✓ | |||||
| Toggle allowing/disallowing snooze | ✓ | |||||
| Delete other accounts | ✓ | |||||
| Disable other accounts | ✓ | |||||
| Update information for other user | ✓ |
How do I assign roles when inviting new users?
- Go to Admin tools, or the Repositories/Vulnerabilities/Dependencies view
- If needed, input your password to enter the administrative mode

- Click on Invite users
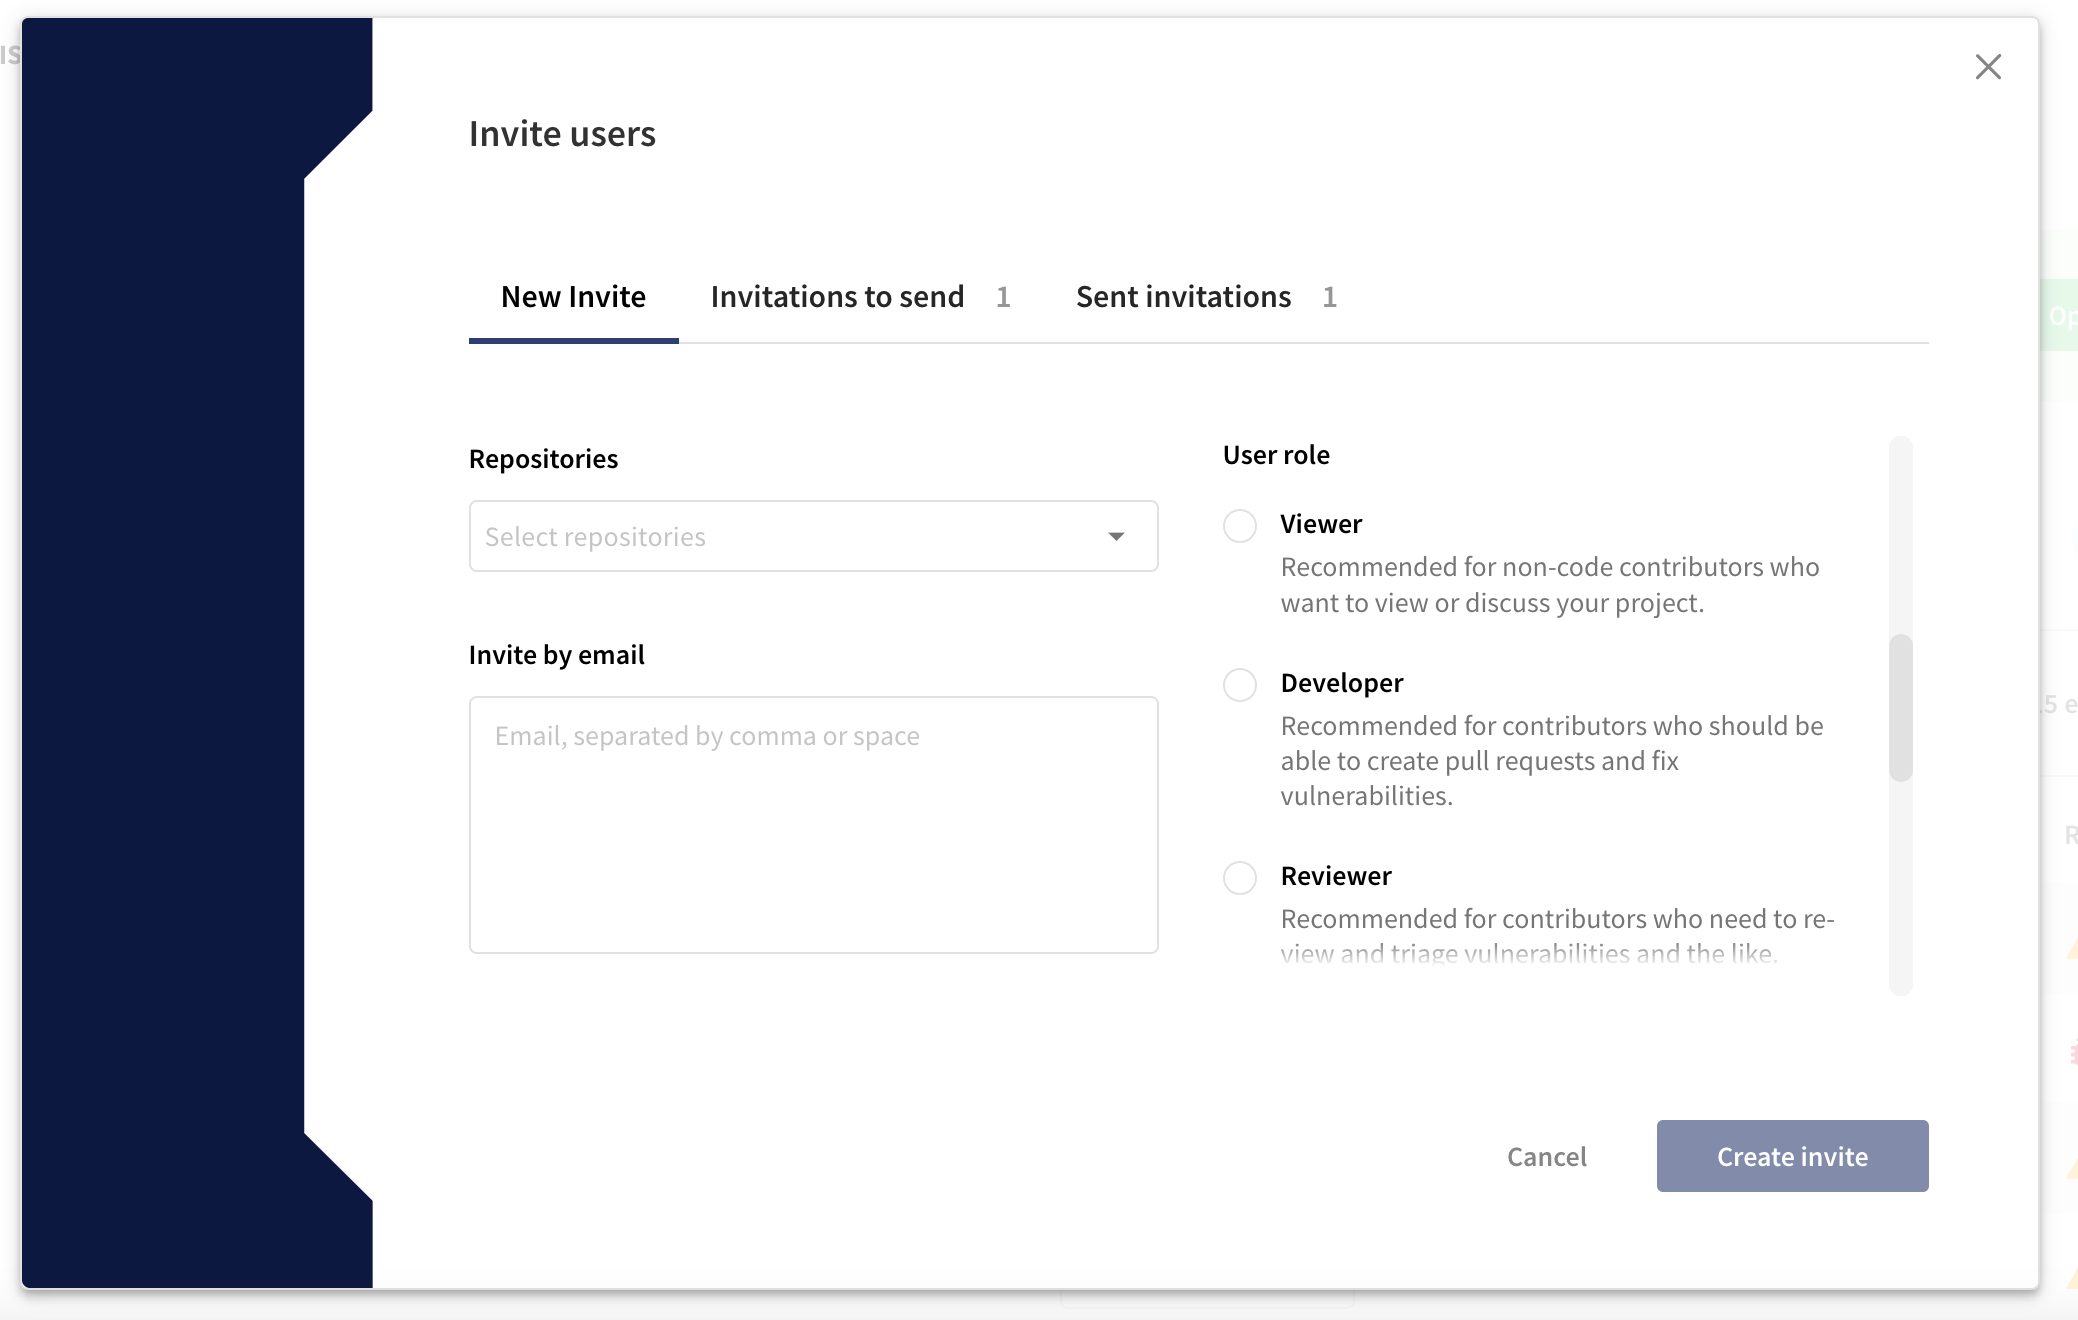
- Select the repository(s) you want the users to be invited to
- Add the emails of the invitee(s)
- Select a user role for each of the invitee
- Click on Create invite
- The invitation then shows up in the Invitations to send tab. Here you can Edit or Delete it if needed
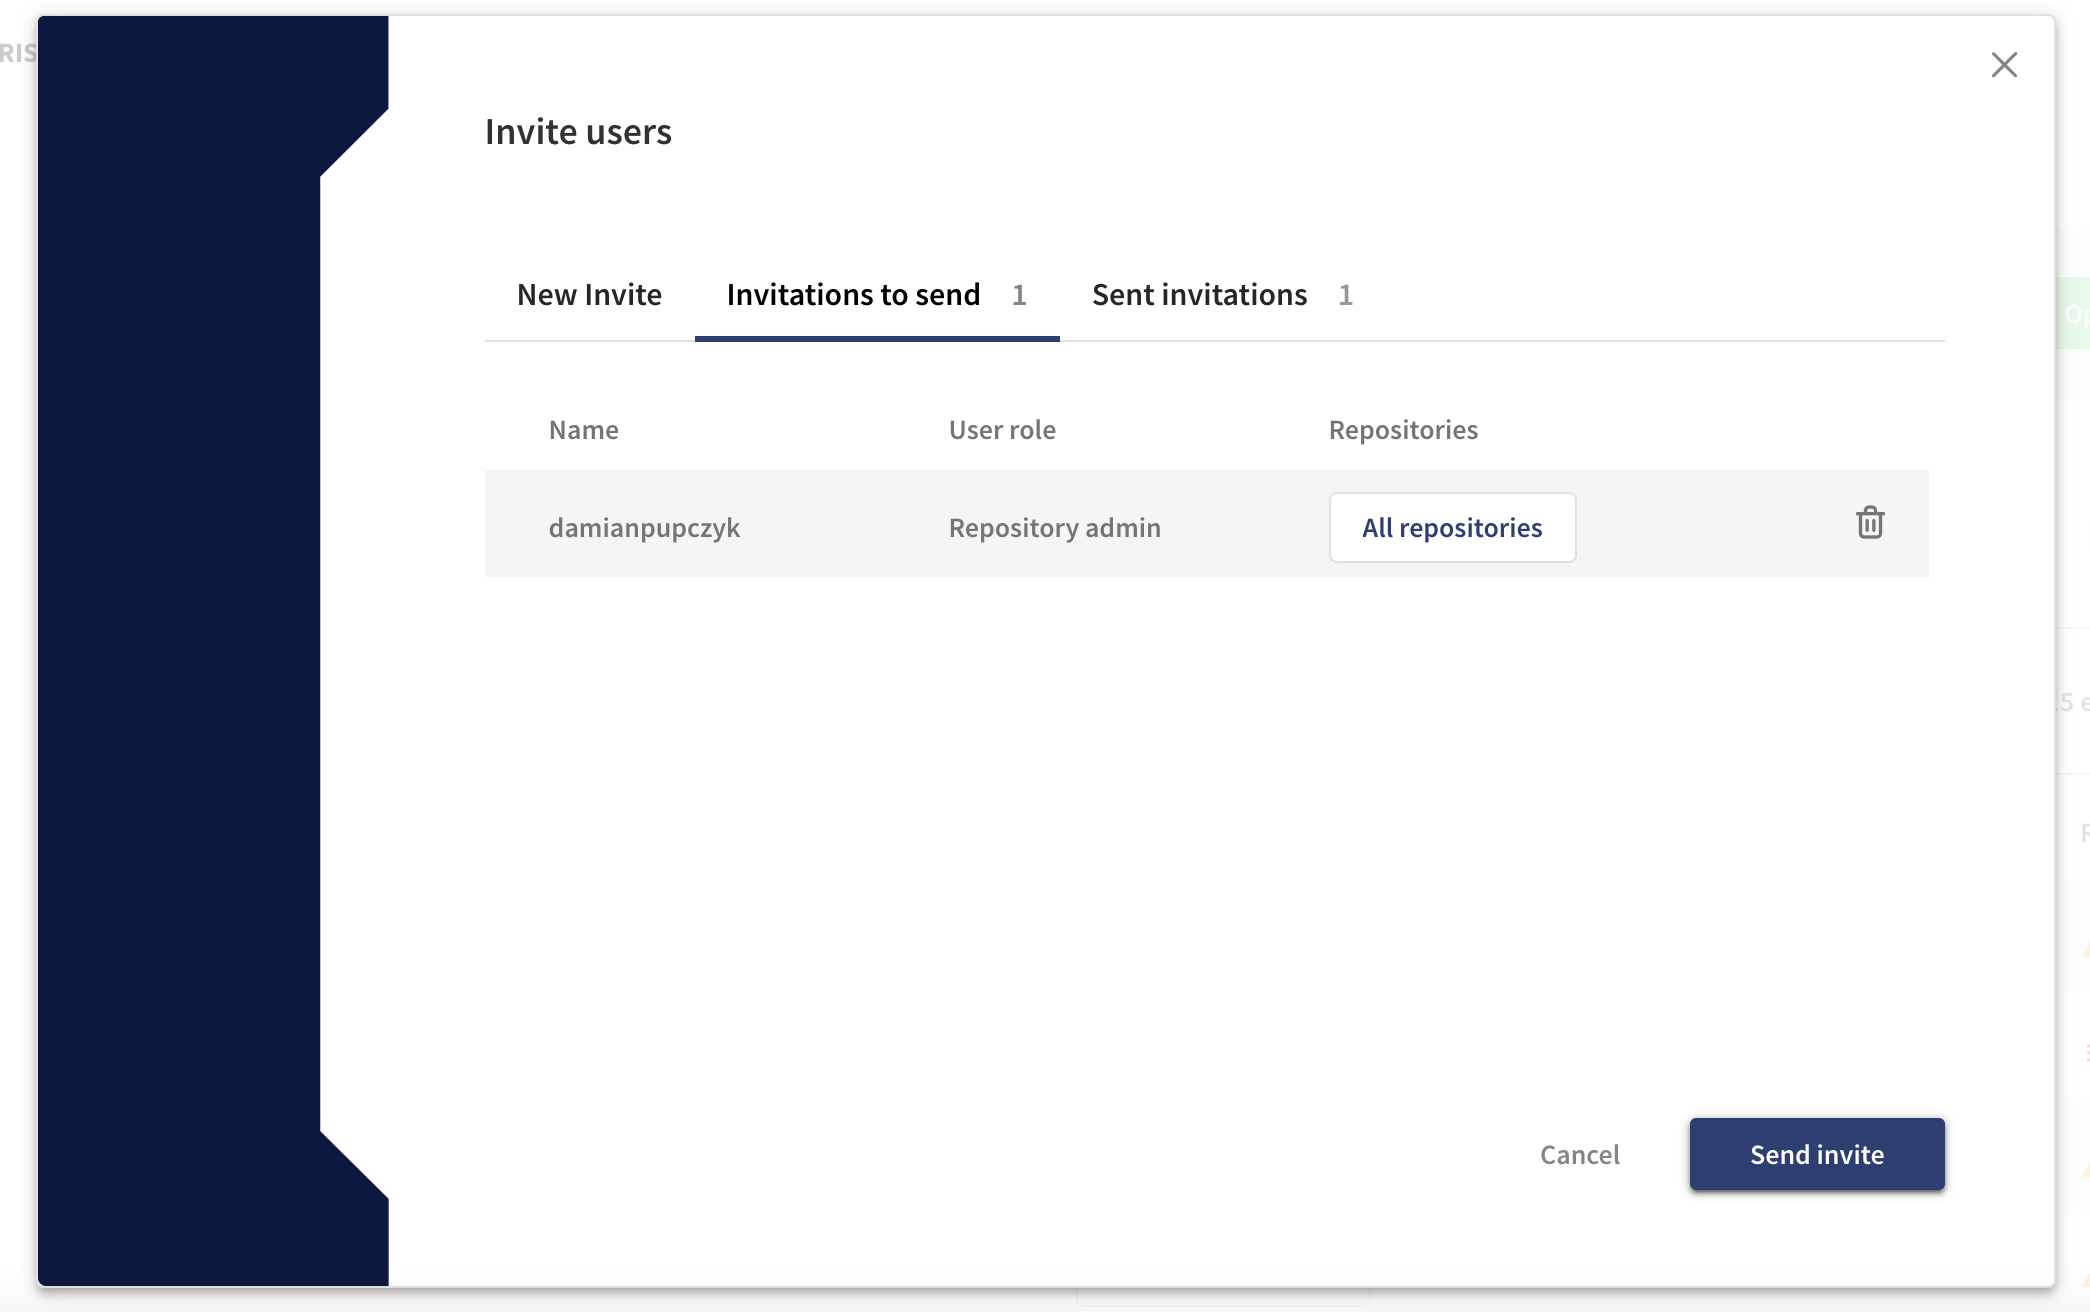
- Once you review it, click on Send invite
- The invitation then shows up in Sent invitations. Here you can withdraw the invitation by clicking on Delete
How do I modify access of an existing user?
- Go to Admin tools
- Input your password to enter the administrative mode
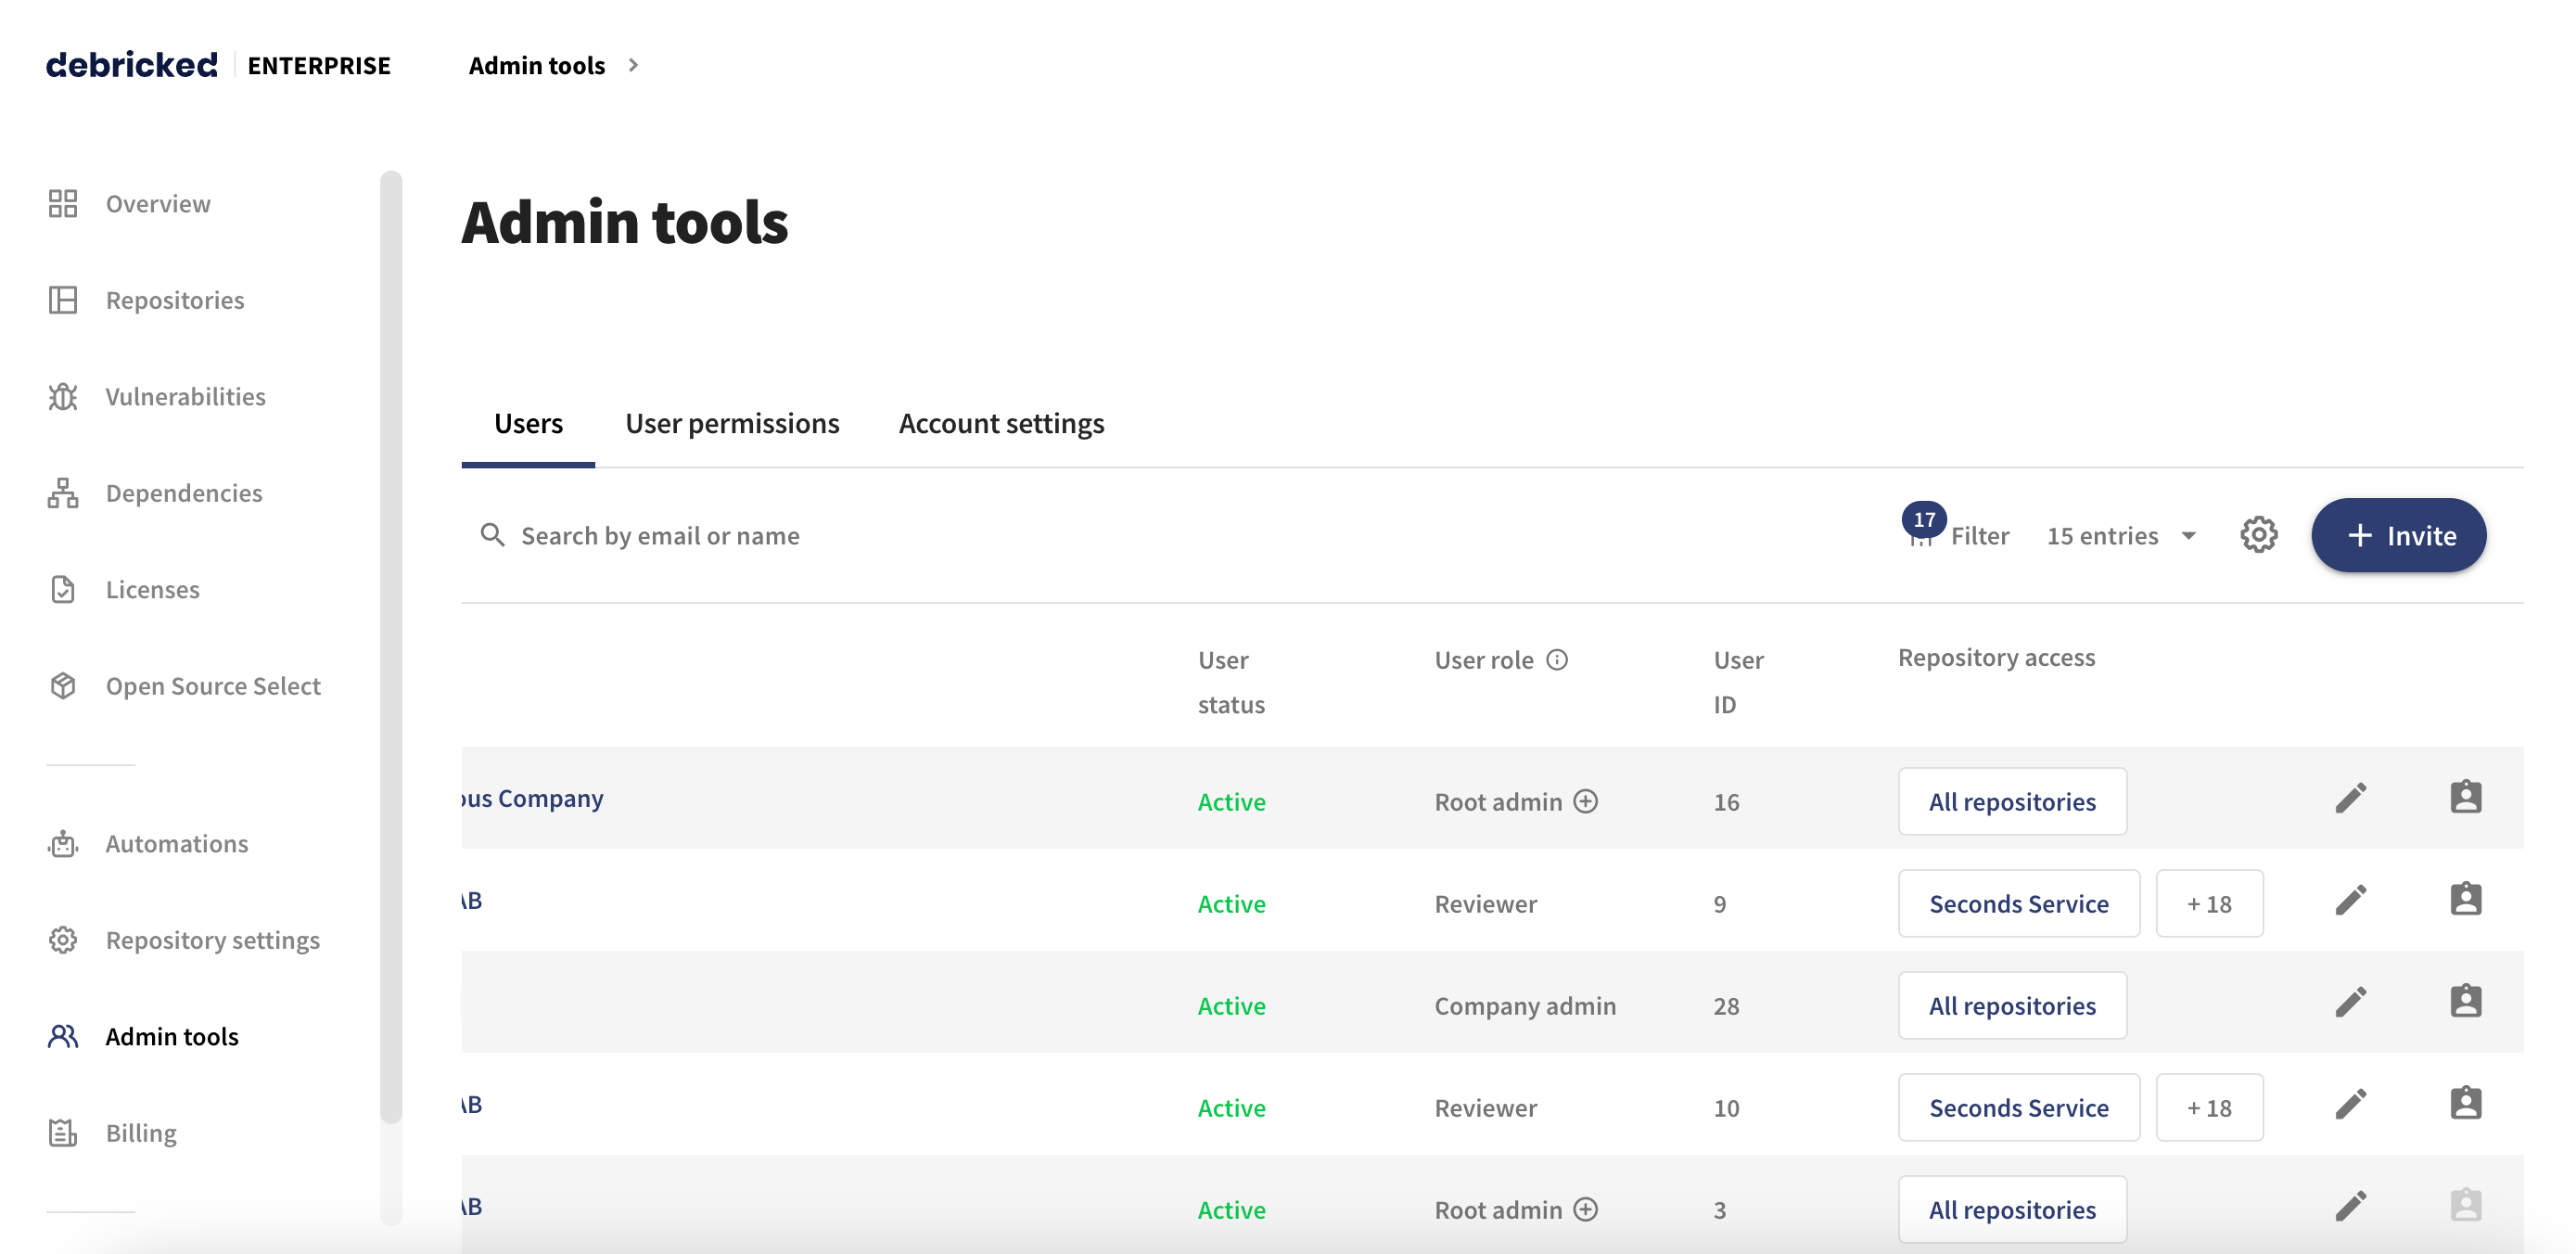
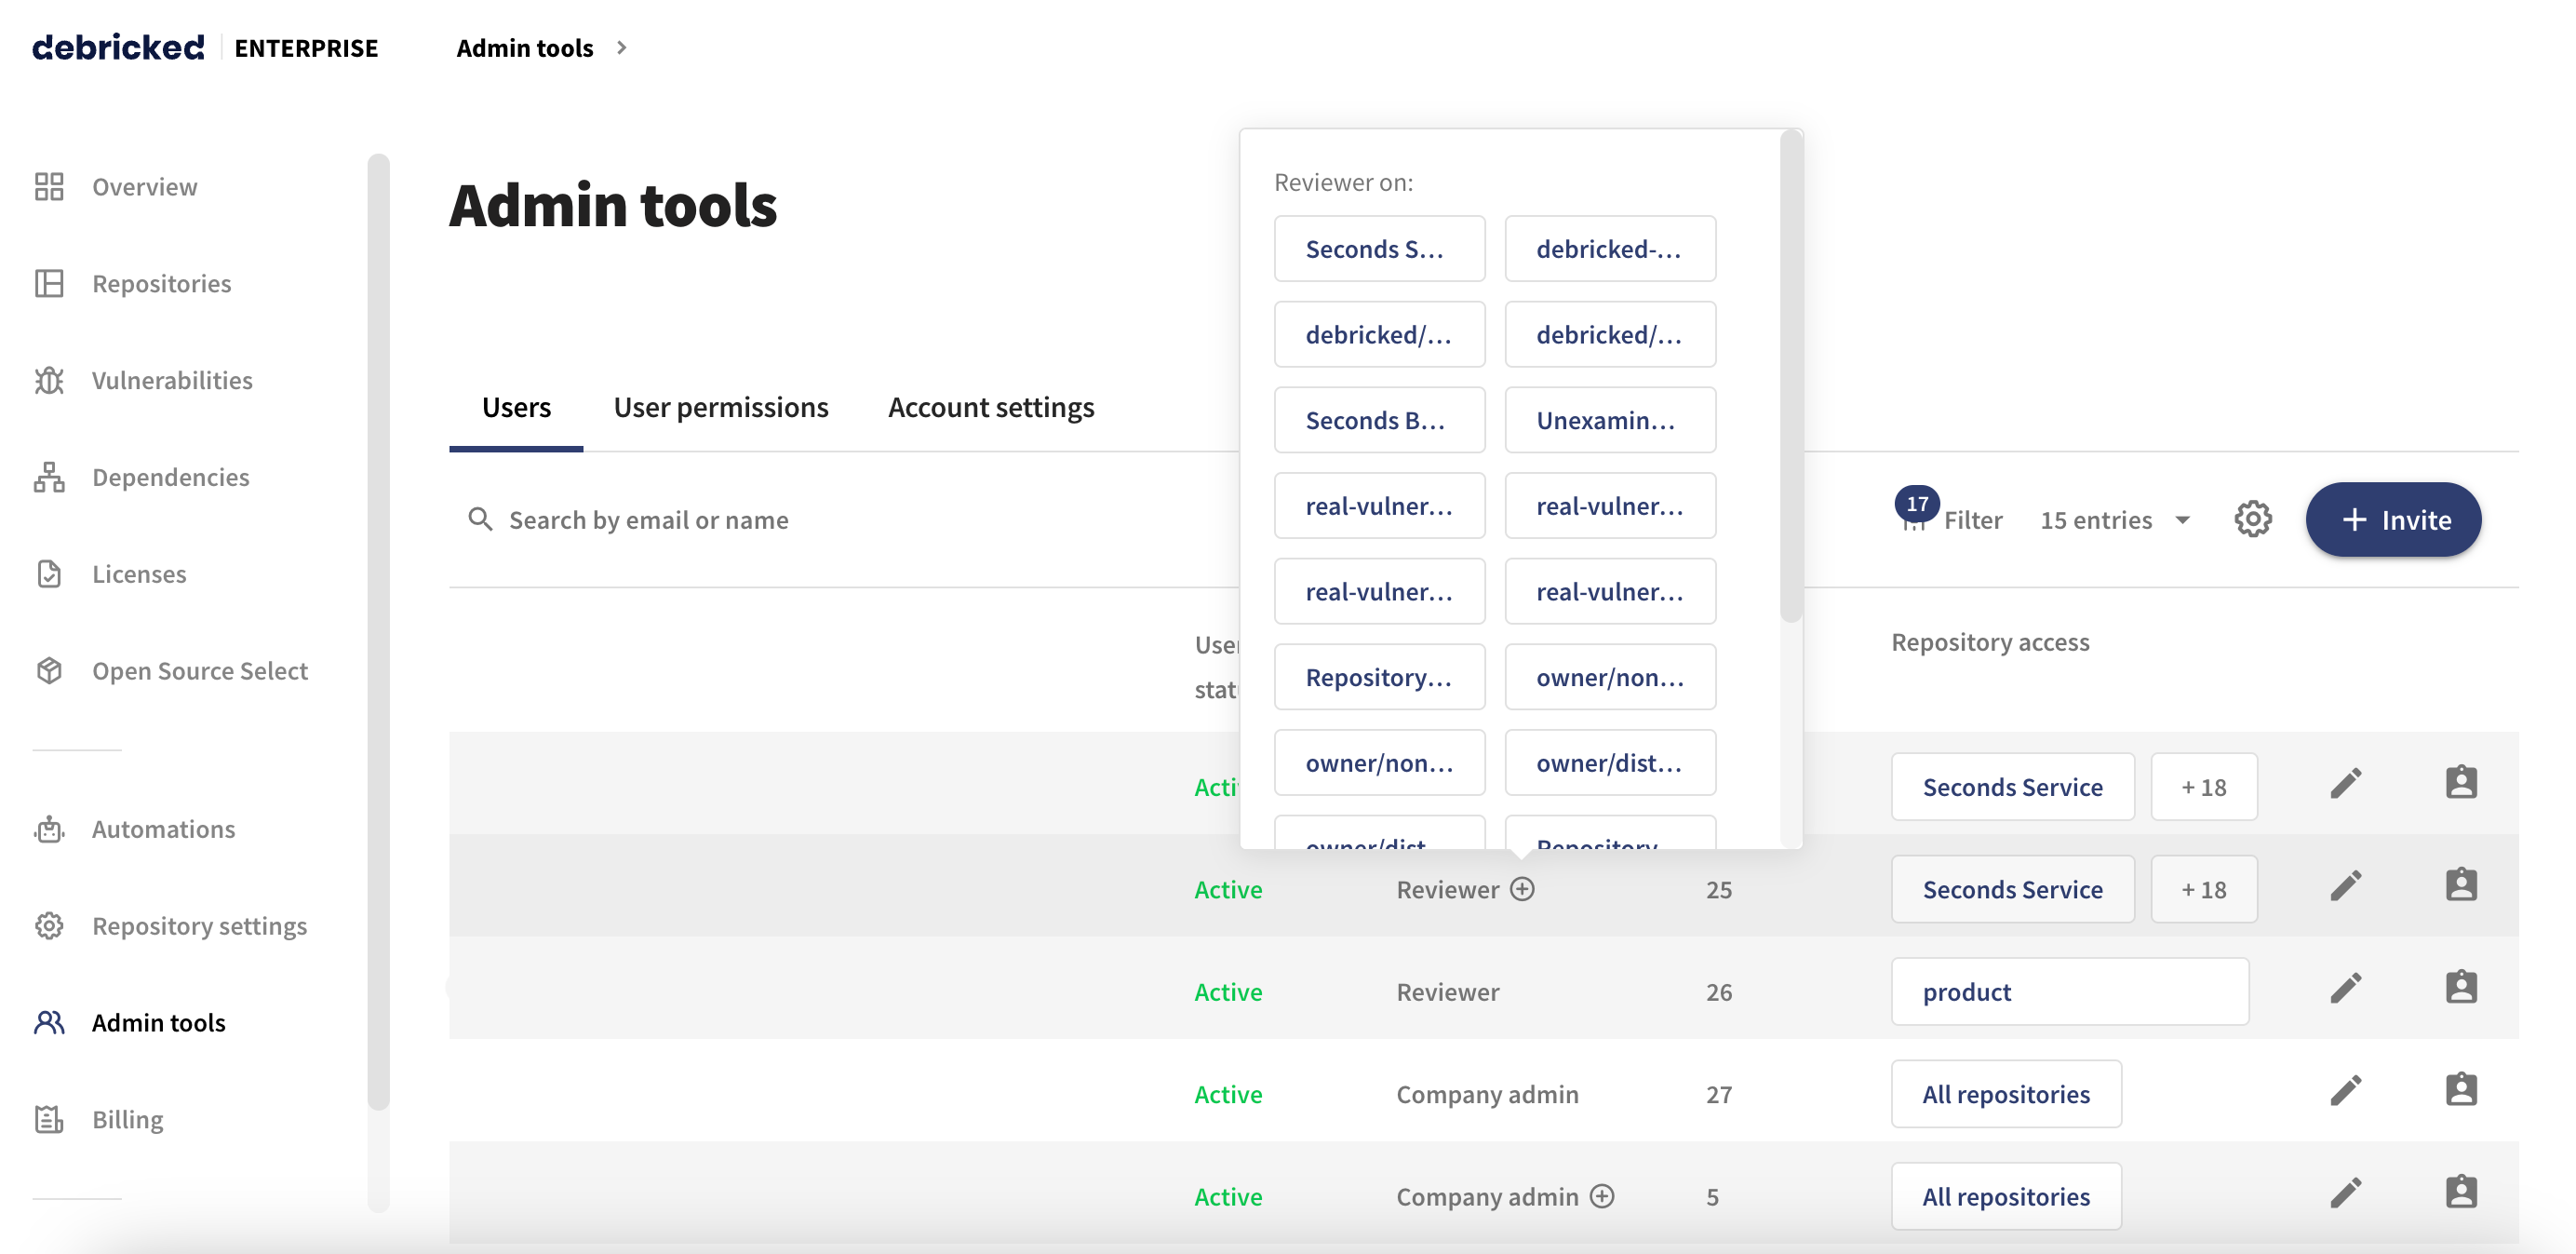
- In the Users tab, find a list of users in your company. If you hover over the rule name in the User role column, you can see all of the current roles of that user and their scope(s)
- To edit the role, click on the Edit button (pen icon) on the right side of the table
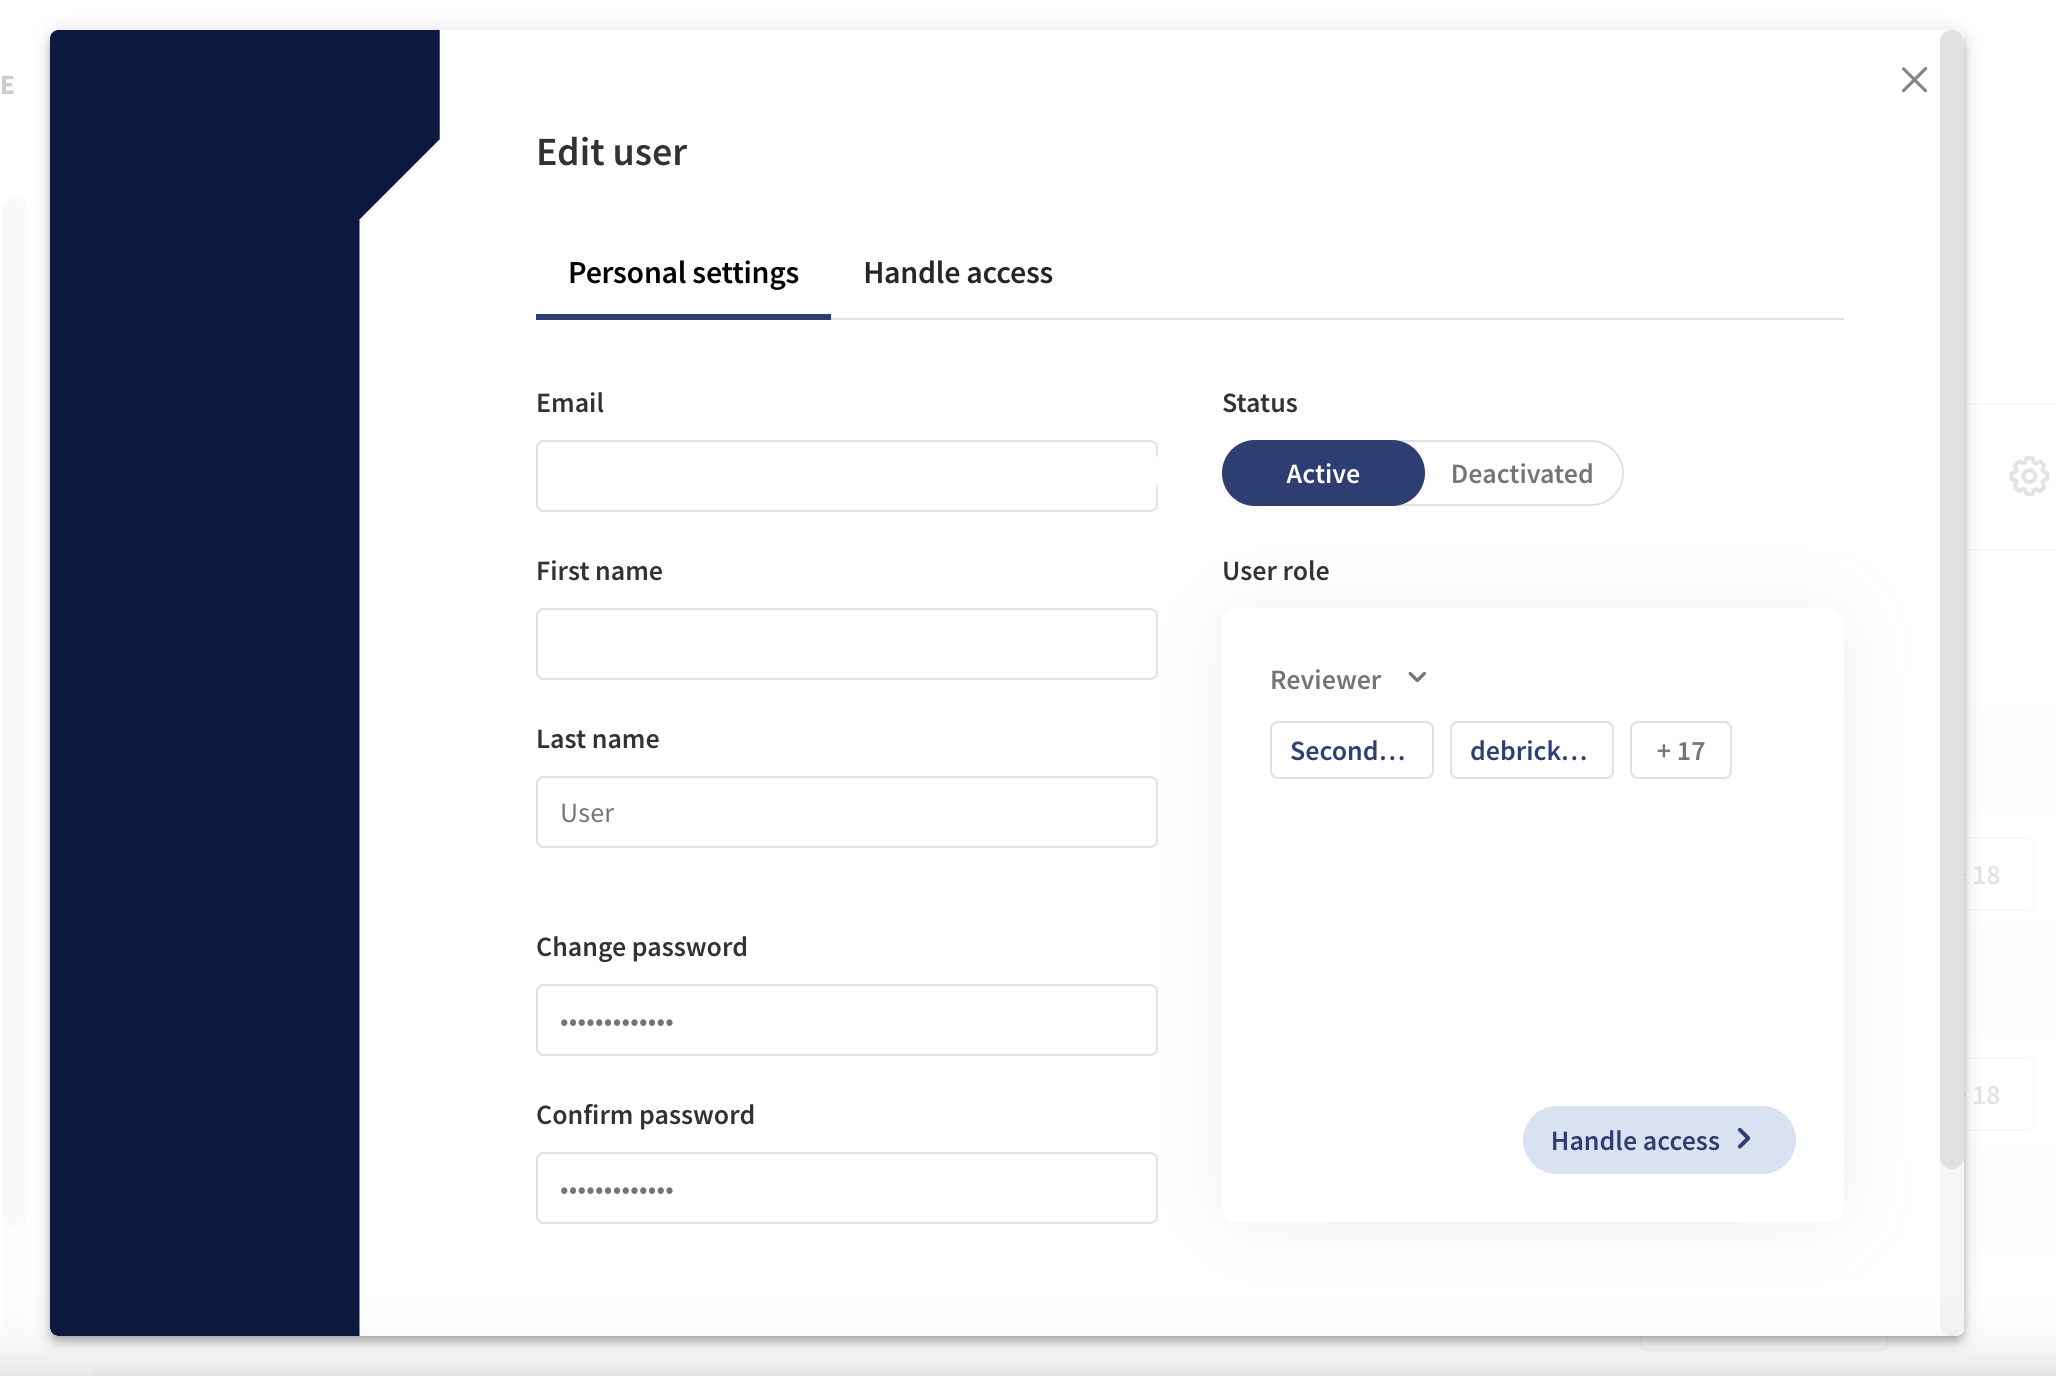
- Click on the Handle access tab, or Handle access button
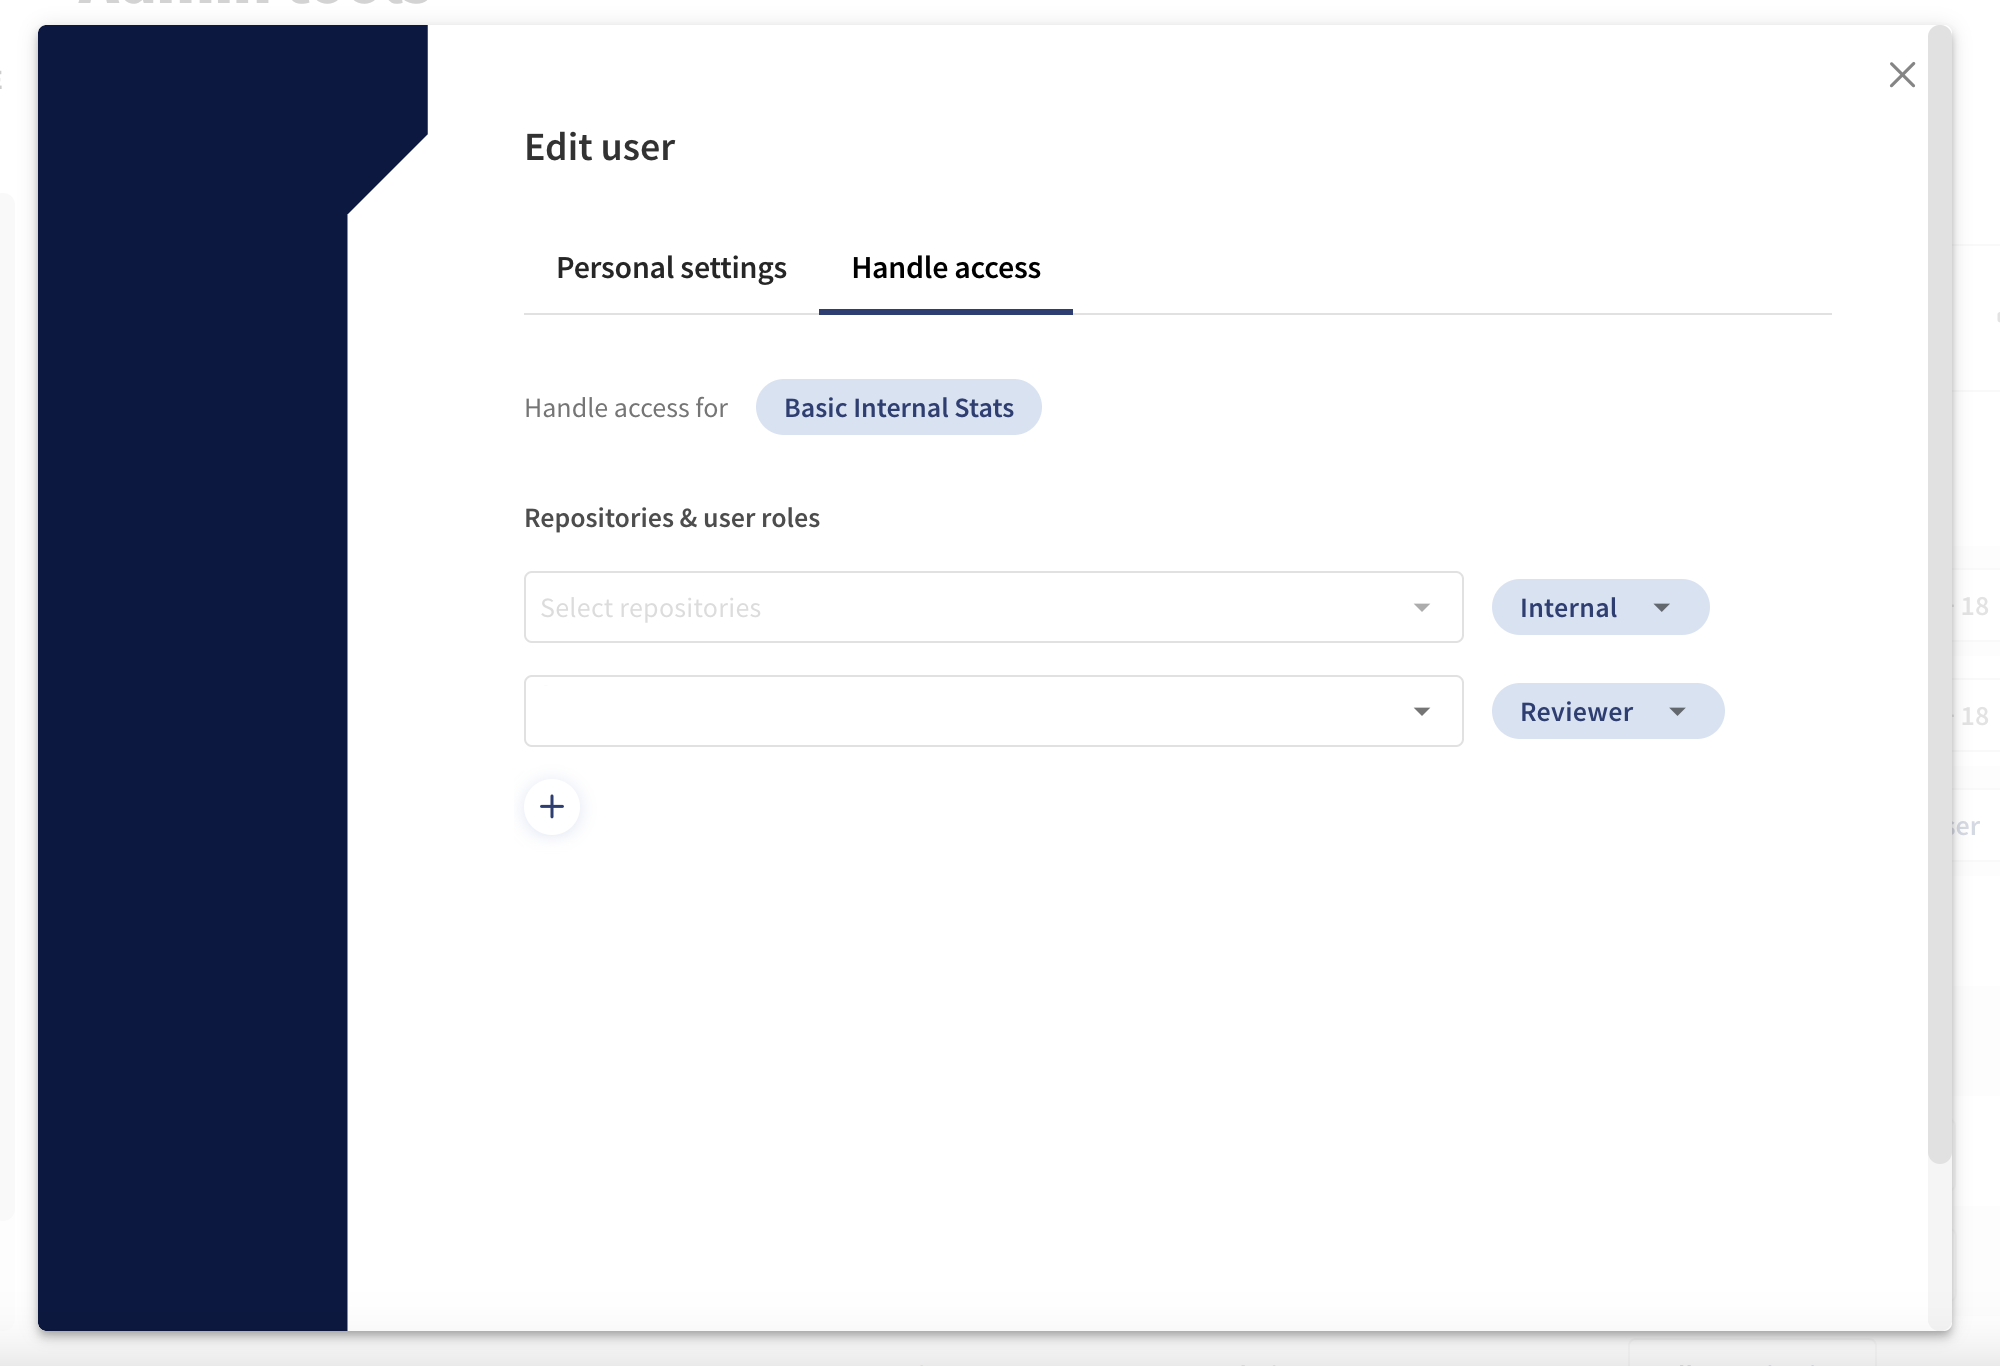
- Here you can edit the user’s existing role(s) and their scope(s). To assign a new role click the + button